Easily Deploy A Seneca Microservice to ECS with Wercker and Terraform Part II
Among the many players in the continious integration SaaS providers, I recently discovered Wercker:
Build apps faster. Release often. Automate all the things.
The following is the second of a three-part tutorial on how to use Wercker along with Hashicorp's Terraform and AWS Elastic Container Service (ECS) to easily deploy minimal docker services. If you haven't, please start with the first installment and then continue here. In this installment we'll be looking at Wercker's build and deploy pipelines.
The Build Pipeline
In the first part of this tutorial, we learned about Wercker's dev pipeline and how to use it to orchestrate a development environment locally. When you are done coding and testing and want to push some new feature or bug-fix, the build pipeline controls your local build or a CI build on wercker.com.
To get started, create an account at wercker.com, next create a new application by linking GitHub to our Wercker account. The Wercker quickstart for nodejs has a good walkthrough on how to setup and link your GitHub project.
Build pipelines have an end result called an artifact which is the result of your pipeline. Wercker stores this artifact on its infrastructure such that it can be used in deploy pipelines. The artifact is stored both as a container and a tarball of just the source files.
Here's our build pipeline definition in wercker.yml:
...
build:
  steps:
    - script:
        name: set env vars
        code: export NODE_ENV=test

    - npm-install

    - script:
        name: install test deps globally
        code: npm install -g tape xo

    - npm-test

    - script:
        name: copy files
        code: |
          cp $(which node) "$WERCKER_OUTPUT_DIR"
          cp -RL node_modules config data api index.js package.json "$WERCKER_OUTPUT_DIR"
...
Since node_modules is not commited to the repo, we'll use the npm-install step, and then run our tests with the npm-test step. That way we can hook up notifications to blame the poor sap who broke the build.
If the tests pass, we just need to copy any files needed for the build artifact. In this case, since I've statically compiled node, the node binary is copied
to $WERCKER_OUTPUT_DIR and then any files we need to run the microservice, such as: node_modules, config, etc. Let's
push our new code (with a few tests) and see if the build process works.
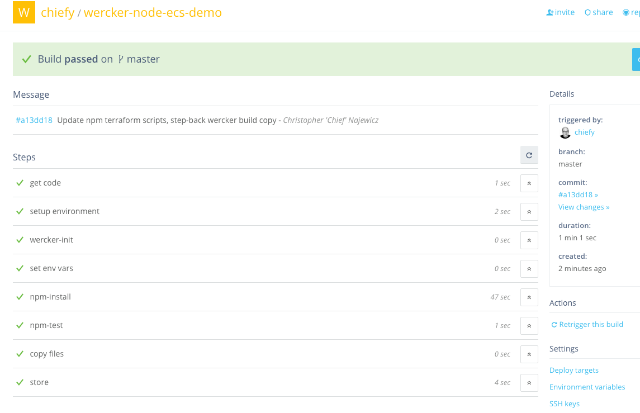
Yay! Our build ran and passed. If you had issues, you could inspect each step that Wercker takes though the web UI, or you can run build locally to debug.
The Deploy Pipeline
Now that the build pipeline is succesful, there's a healthy artifact out there, just waiting to be lovingly deployed, somewhere... The overall goal is to deploy to AWS ECS, but the first part of the deploy chain is pushing the generated artifact to DockerHub as a tagged docker image that will be pulled into an ECS task later.
Here's the deploy pipeline in wercker.yml:
...
deploy:
  dockerhub:
    - internal/docker-scratch-push:
        username: $DOCKER_USERNAME
        password: $DOCKER_PASSWORD
        cmd: ./node ./index.js
        tag: $WERCKER_GIT_COMMIT
        ports: "3000"
        repository: chiefy/wercker-ecs-demo
        registry: https://registry.hub.docker.com
...
For each deploy, you need to provide a name that distinguishes it so you can later reference it on Wercker's UI. Our first deploy target will be
pushing a docker image to DockerHub, so dockerhub it is! As with all the other Wercker pipelines, use steps to define how to deploy the artifact.
Here the internal/docker-scratch-push step is used. This is a handy step that simply uses whatever you copied into your $WERCKER_OUTPUT_DIR and places it inside a FROM SCRATCH docker image.
The main benefits of slim docker images are: fast pulls and increased securty (decreased attack vectors). If you are using Go, this is a great option as well.
Since we're using a statically compiled node binary, simply copy the binary to WERCKER_OUTPUT_DIR along with the pre-built node_modules folder and things should run without any other system dependencies.
Injecting Secrets Into Your Deploy
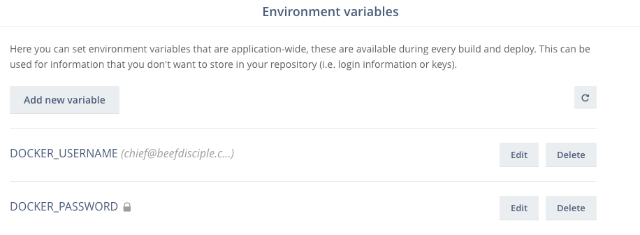
Of note are the two environment vars: $DOCKER_USERNAME and $DOCKER_PASSWORD. These get injected by Wercker at deploy time. You manage
these secrets in the web UI by clicking on the settings cog inside your application and then "Environment variables." Per-deploy-target environment
variables can also be set after creating a deploy target.
Commit and push the new deploy pipeline to create a new build.
Adding a Deploy Target
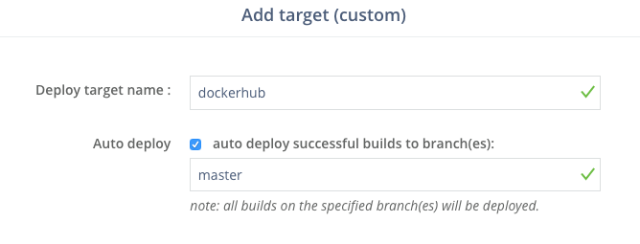
Unfortunately, Wercker can't currently detect your deploy pipeline names, so you must register it by using the web UI: click the cog icon in the
upper right of your application's page. Go to "Targets," and add a new "custom deploy" target with dockerhub as the name
and check "auto-deploy" and make sure to enter "master" in the branch whitelist below.
Push To DockerHub
To test the newly added deploy target, push a change to git and watch the wercker UI to make sure it builds succesfully. Since auto-deploy has been setup, after building, the resulting artifact should get pushed to DockerHub:
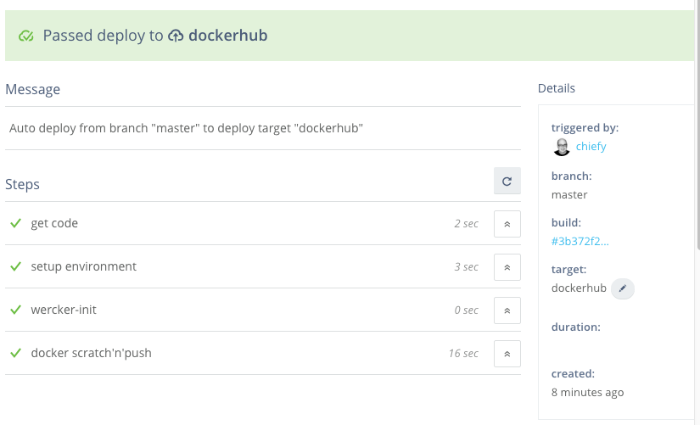
Confirm the image was pushed by logging into DockerHub and checking the tag:

Summary
Wercker's build and deploy pipelines allow you to easily define steps to produce a build artifact and then deploy said artifact any number of ways. In the second part of this tutorial, we learned how to use these pipelines and built and deployed the Seneca-based microservice to DockerHub. In the next and final part, we'll use Hashicorp's Terraform to create AWS ECS infrastructure which the service can be deployed to using a custom Wercker deploy step.